I decided to clean my old Nintendo cartridges after digging the systems out of storage. This video is a quick representation of what I learned in the process.
This is the second vacuum chamber I have built. The new chamber is sized to fit larger patterns which I need to degas.
I put together this video while visiting family over the holidays. After having created this I feel like I might know what I need to do next time to make this video more useful.

A short video covering the blast etching process I used on a Pelican 1750 and 1400 case.
A short video about bending polycarbonate without heat.
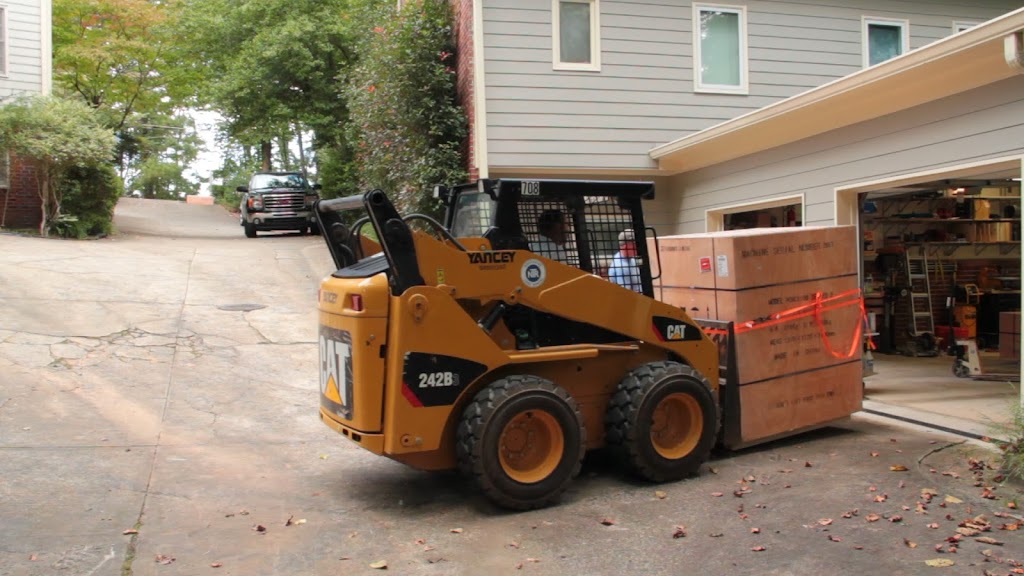
A few comments on Tormach PCNC 1100 delivery and setup with some special notes on getting the machine down a sloped driveway.
I made a short video going over a few points about spray cans; how they work and some safety issues. A couple of lesser know items are reviewed such as FDA not regulating cosmetic products.

Suppose you asked someone what they did for a living and they said, “I am a hammer”. You might find this strange. You might also find it strange for them to say, “I am a table saw”. However it would be quite normal for them to answer saying, “I am a carpenter”.
Far to often we confuse our proficiencies with the tools of our trade with our actual profession. This is not a good outlook. I use the tool not the other way around. I am not the programming language I am the software engineer.
So why bring this topic up? Because anyone who believes they are defined by the skills they have in their tools will be limited by those tools. Remember this when you get the chance to learn something new.
 |
| We do not always get to pick the project we work on |
Sometimes a company will halt all development on a project only to restart it at a later (sometimes much later) date. The reasons for this are many and varied but there are a few things to keep in mind which might help you if you ever have to restart an old project.
Find all of the resources involved with the old project.
This would obviously include the source for the project. It also includes build scripts, tests, requirements docs, and any other support files.
In addition to the files which make up the project it is useful if you can find the systems which were involved in previous development such as build servers and developer workstations. Some parts of the project may not have made it into source control or it may have an unexpected prerequisite to build or run. These may be identified by examining the old build/dev boxes.
You may also try to track down any email chains involving the project. Even if all of the people involved in the original project are gone the company may have kept an archive of their inboxs in case they needed to be referenced for just this purpose.
Determine the state of the project
Once you have all the bits of the project together it is time to determine where the project was when it stopped. This will accomplish a couple of things. First it will help you and those who want to restart the project determine if the restart is actually worth the time. Second it will keep you from accidentally rewriting functionality which is already present but not immediately obvious.
Setup or create a build process
If the project has a set of build scripts or some manner of build process it should be reinstated on a nightly or continuous integration build machine. If not then a process should be created.
If this is an internal tool then it should copy its binaries (or other end user useful bits) to a build repository. If this project has installers or some other more involved deployment system then these deliverables should be built as part of the build process and copied out to your build repository.
A build created on a dev workstation should only be used by a dev. Only those builds created by a build server (which should be labeling the builds) should be distributed, handed to QA, or shipped to customers. Adhereing to this rule will prevent one off and otherwise unrepeatable builds from entering the wild.
Are there unit tests for any part of this project?
If you should be so lucky then these are the next items up to reinstate. Tests will help give you an idea of how the various parts of the project are supposed to work (or expected to break) as intended by those who wrote them. They can also catch fatal flaws you might introduce in the future due to a lack of knowledge of how a particular component is intended to be used.
Deploy a build for QA
Using the output of your now functioning build process deploy an instance of this project and the test it. Validate the current level of functionality of the project. If you have a bug tracking system which has records for this old project then check any obvious issues against any open defects.
The goal of this step is two fold. First is to ensure the project is still in sync with any requirements documents and bug tracking systems you may have. Second is to survey for yourself the true current state of the project with a build and deployment which you can now reproduce.
A quick note about build reproducibility. You should always ensure your build process can exactly recreate any arbitrary build which has come before. There are several insidious things which could prevent this ability with the simplest example being files not under source control (possibly some infrequently modified data files or libraries). Should a defect be introduced into files not under source control this defect will effect all new builds including those of older versions or on branches.
Validate the restart of the project
This point may arise earlier based on what you find along the way, if not then now is the time to consider whether restarting the project is worth it.
It may turn out the project doesn’t actually do what project management thought it did. Or perhaps it does do what project management thought but is at a lower level of development than expected. A great number or severity of defects may also make the project a non starter. The project may have some big external dependency which is difficult to support or expensive to license. Even if none of the previous apply it may be difficult to add the new features project management wants to the project given the way it has been designed and built.
The last and possibly most important point
If the objective of restarting an old project is to add some small feature to an old but operational deployment you may be tempted to just make the change to the source, build on your local system, and manually update the binaries on the production system. This is very bad idea.
If you successfully pull off the update, then all is well. If, however, there are complications it will be very difficult to determine if the issue is caused directly by your update, indirectly through its interaction with other parts of the system, or if your update had nothing to do with the new issue at all. Additionally if you made a manual update to a system which is normally deployed via an installer you have now created a deployment which you may not be able to reproduce thereby making QA by another group virtually impossible.
Parts and Operation
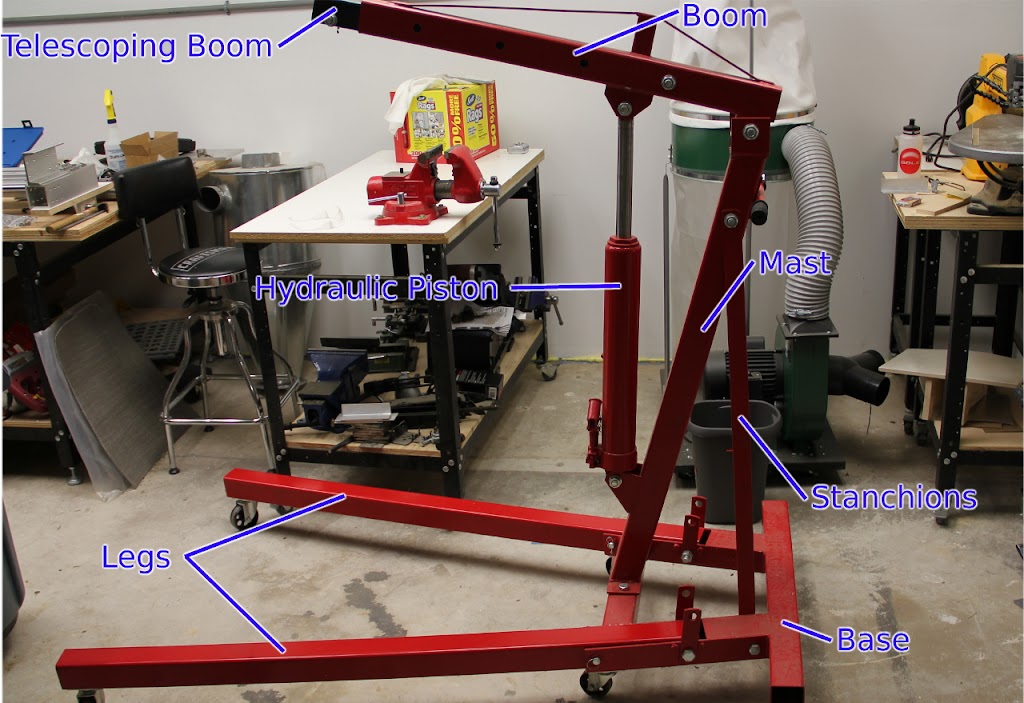 |
| Crane Parts |
There are not many parts to these cranes and assembly is simple (with the exceptions noted below). These cranes have a simple frame with arms which fold up for storage. A hydraulic ram supplies the mechanical advantage necessary to lift the load. All you need to do to operate it is lower the arms, attache your load, close the hydraulic valve and pump the ram. When you are ready to lower the load just (slowly) open the valve.
Notes on Assembly
The assembly instructions for these types of shop cranes indicate the mast is to be attached before the stanchions. In some cases you may find if you follow these instructions the stanchions’s holes will not line up with the mast and the base. I believe in these cases the stanchions are intended to be preloaded by the mast. Just loosen the bolts holding the mast to the base, attach the stanchions, and then tighten the mast bolts.
Lifting stuff
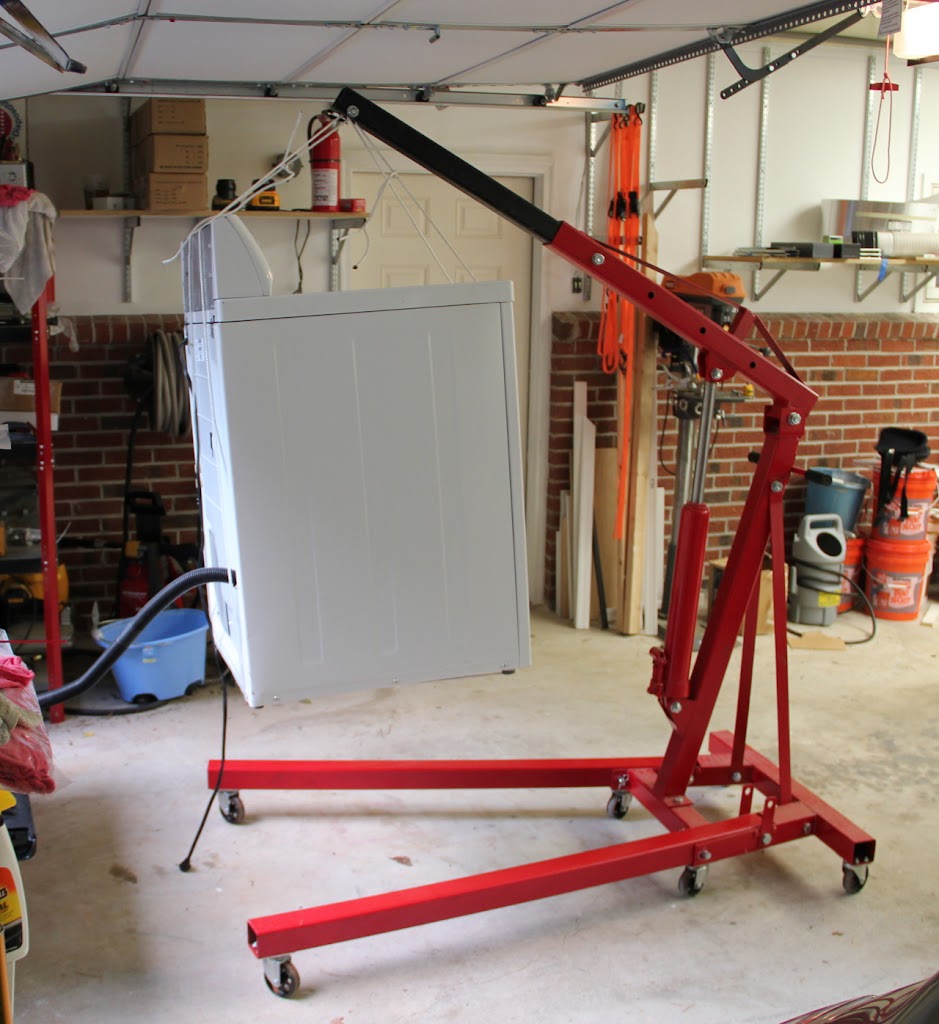 |
| engine crane lifting a washing machine |
Here an engine crane is being used to lift a washing machine. I was not feeling all that well the day I needed to move this. So I opted for a reduced stress method of getting this washing machine into the back of a truck.
Lifting with these cranes it not complex but there are a few things to be aware of.
The crane even without a load is quite hefty weighing in at upwards of 150lbs.
Since normal rope can lift significant loads and is readily available it is a nice solution for lifting things around the house. While convenient rope can stretch quite a bit when loaded. If you lift with rope be certain to take this into account, otherwise you may discover you cannot lift to the height you need because the line has stretched too much.
The load you are lifting must have its center of mass inside of the footprint of the crane. Otherwise the crane will be tip over.
The orientation of the load may change as it is lifted. You may discover as you raise the load your attachment points are not in as ideal a position as you would like. This is why it is important to inspect the load as it is being raised. The sooner the issue is found the shorter the distance you will have to lower it back down.
If you are moving things inside the house be aware of the load at the wheels of your crane. When the arms are down the wheels at the front of the base are not used (they are off the ground).
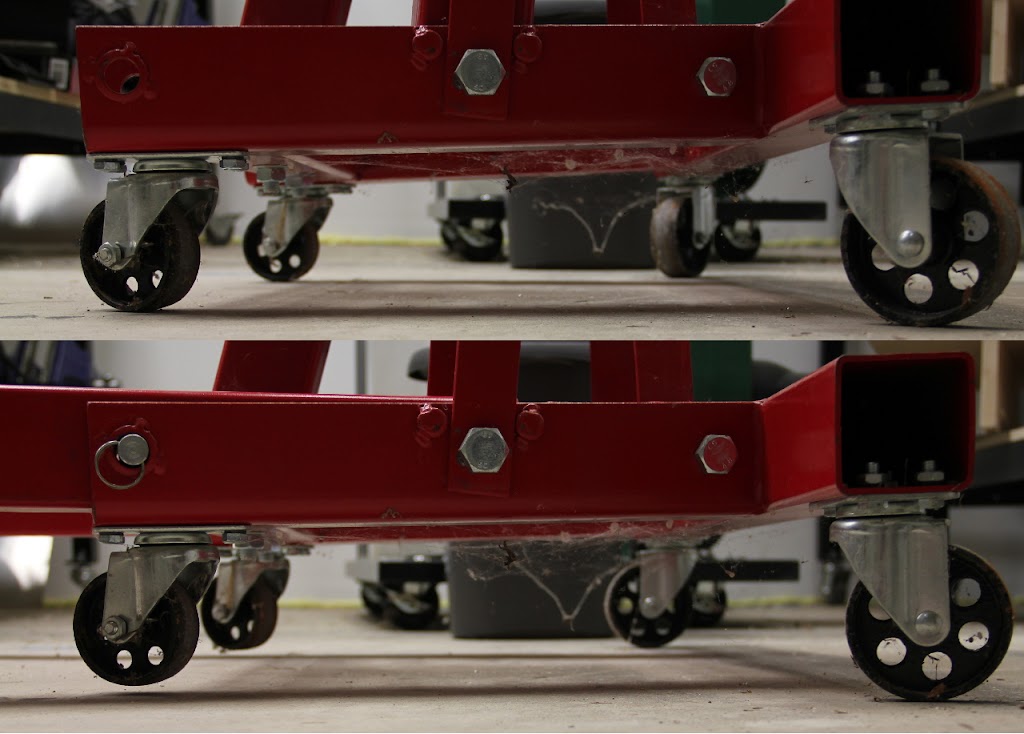 |
| Top: arms up. Bottom: arms down (not the floating wheels) |
This means the weight of the load (and the crane) is distributed on 4 wheels. If the floor is not level you will be on 3 wheels. Some interior floors may not react well to the pressures the wheels of the lift will put on them.