This is the second vacuum chamber I have built. The new chamber is sized to fit larger patterns which I need to degas.
Category: Uncategorized
I put together this video while visiting family over the holidays. After having created this I feel like I might know what I need to do next time to make this video more useful.

A short video covering the blast etching process I used on a Pelican 1750 and 1400 case.
A short video about bending polycarbonate without heat.
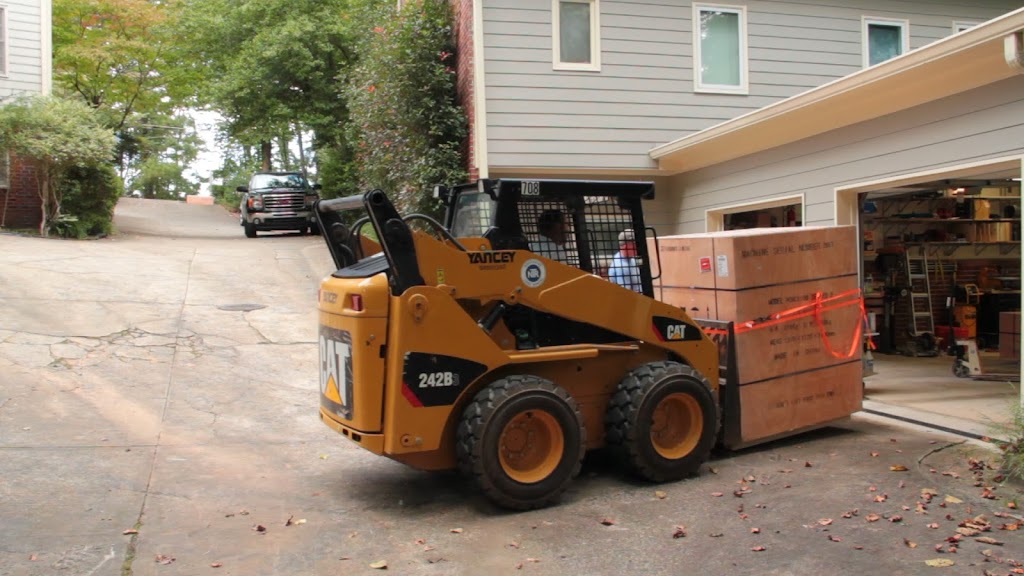
A few comments on Tormach PCNC 1100 delivery and setup with some special notes on getting the machine down a sloped driveway.
I made a short video going over a few points about spray cans; how they work and some safety issues. A couple of lesser know items are reviewed such as FDA not regulating cosmetic products.
Parts and Operation
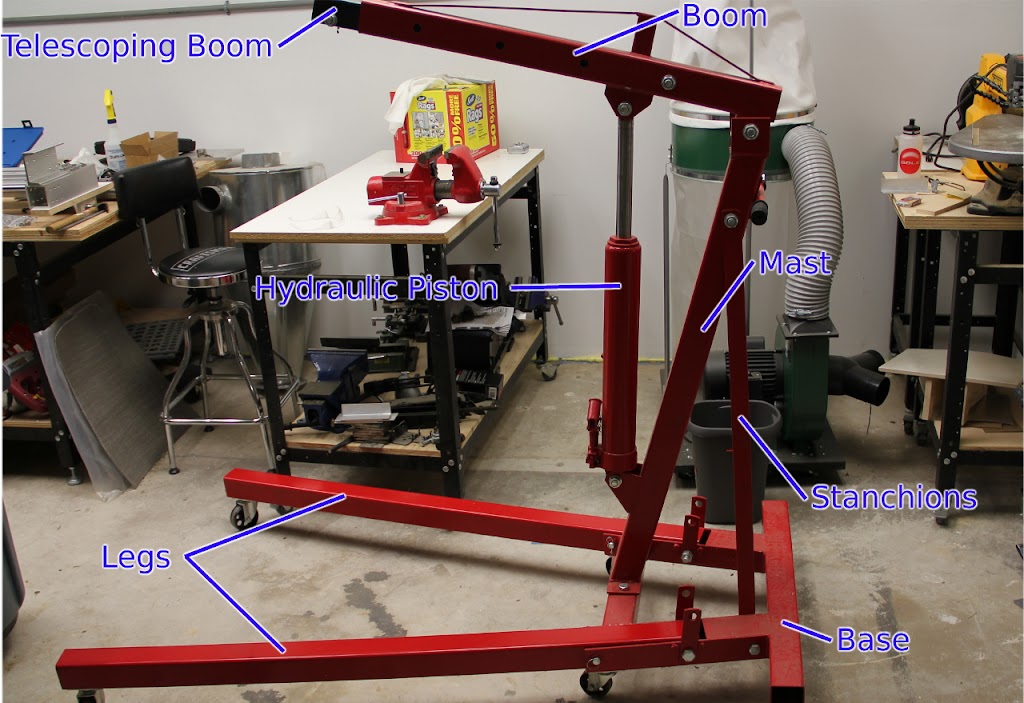 |
| Crane Parts |
There are not many parts to these cranes and assembly is simple (with the exceptions noted below). These cranes have a simple frame with arms which fold up for storage. A hydraulic ram supplies the mechanical advantage necessary to lift the load. All you need to do to operate it is lower the arms, attache your load, close the hydraulic valve and pump the ram. When you are ready to lower the load just (slowly) open the valve.
Notes on Assembly
The assembly instructions for these types of shop cranes indicate the mast is to be attached before the stanchions. In some cases you may find if you follow these instructions the stanchions’s holes will not line up with the mast and the base. I believe in these cases the stanchions are intended to be preloaded by the mast. Just loosen the bolts holding the mast to the base, attach the stanchions, and then tighten the mast bolts.
Lifting stuff
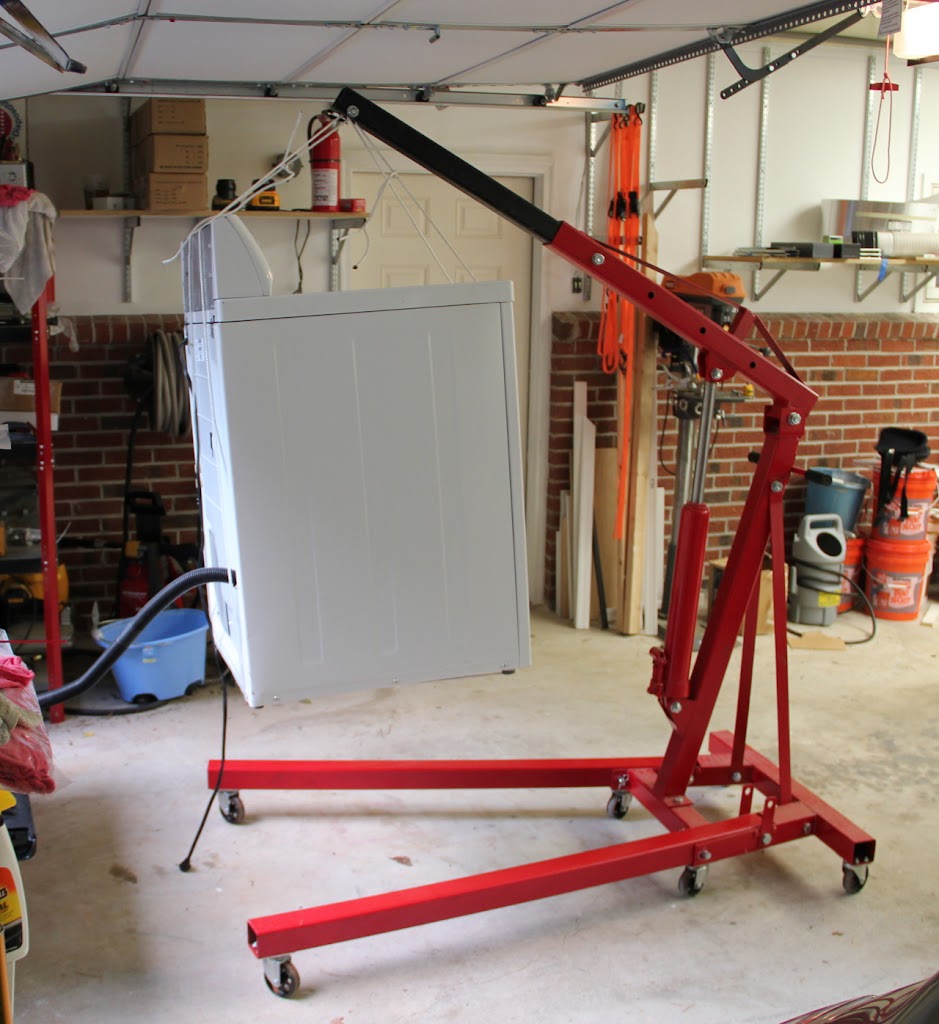 |
| engine crane lifting a washing machine |
Here an engine crane is being used to lift a washing machine. I was not feeling all that well the day I needed to move this. So I opted for a reduced stress method of getting this washing machine into the back of a truck.
Lifting with these cranes it not complex but there are a few things to be aware of.
The crane even without a load is quite hefty weighing in at upwards of 150lbs.
Since normal rope can lift significant loads and is readily available it is a nice solution for lifting things around the house. While convenient rope can stretch quite a bit when loaded. If you lift with rope be certain to take this into account, otherwise you may discover you cannot lift to the height you need because the line has stretched too much.
The load you are lifting must have its center of mass inside of the footprint of the crane. Otherwise the crane will be tip over.
The orientation of the load may change as it is lifted. You may discover as you raise the load your attachment points are not in as ideal a position as you would like. This is why it is important to inspect the load as it is being raised. The sooner the issue is found the shorter the distance you will have to lower it back down.
If you are moving things inside the house be aware of the load at the wheels of your crane. When the arms are down the wheels at the front of the base are not used (they are off the ground).
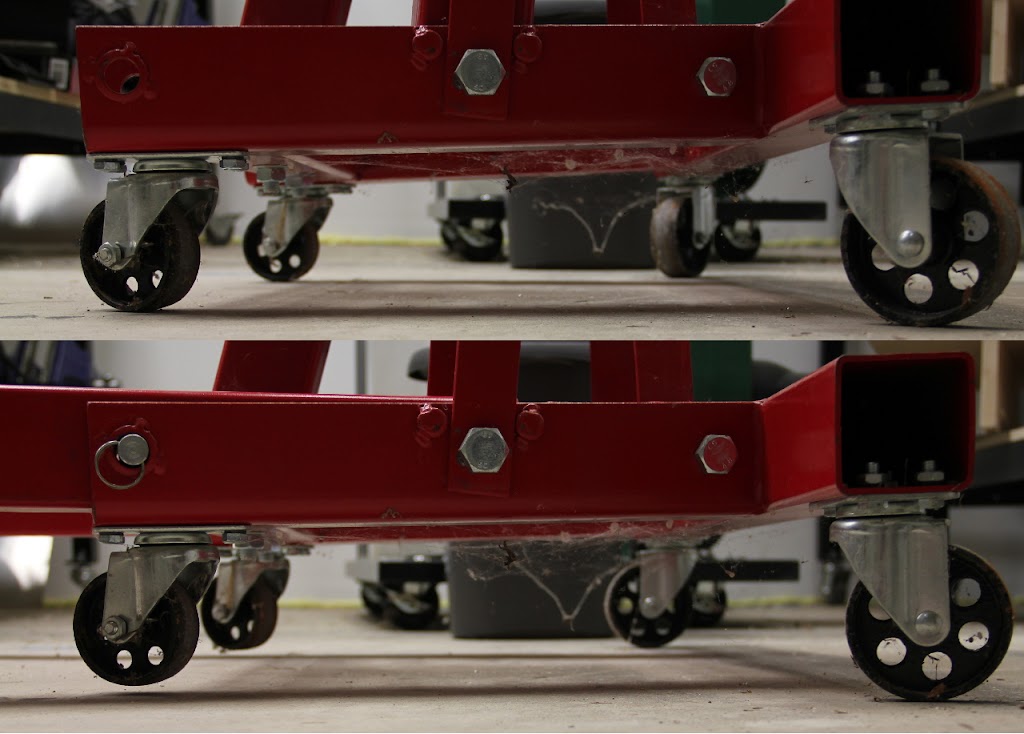 |
| Top: arms up. Bottom: arms down (not the floating wheels) |
This means the weight of the load (and the crane) is distributed on 4 wheels. If the floor is not level you will be on 3 wheels. Some interior floors may not react well to the pressures the wheels of the lift will put on them.
In short:
Can you: Yes.
Should you: No.
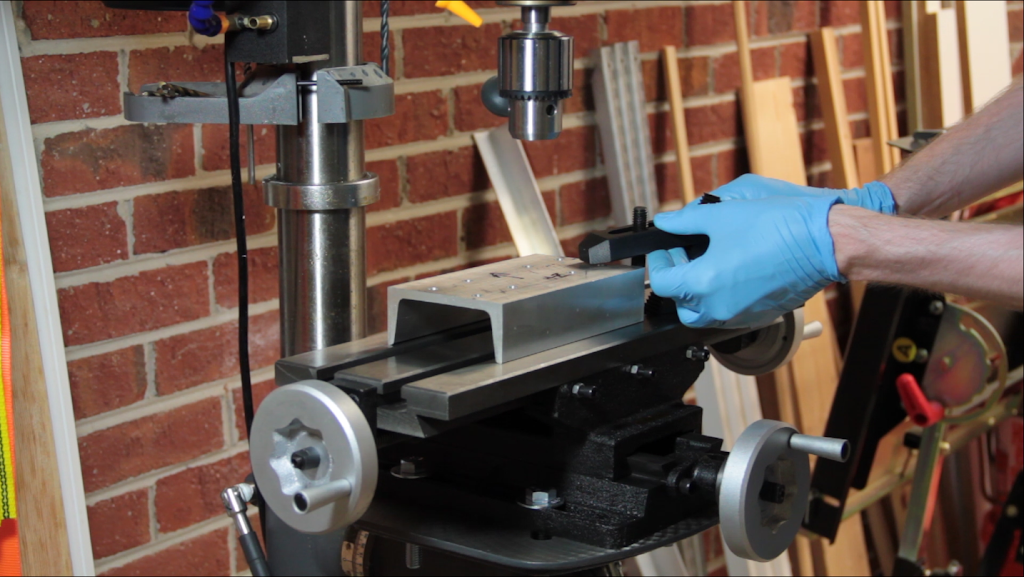
A quick video about using compound tables with drill presses.
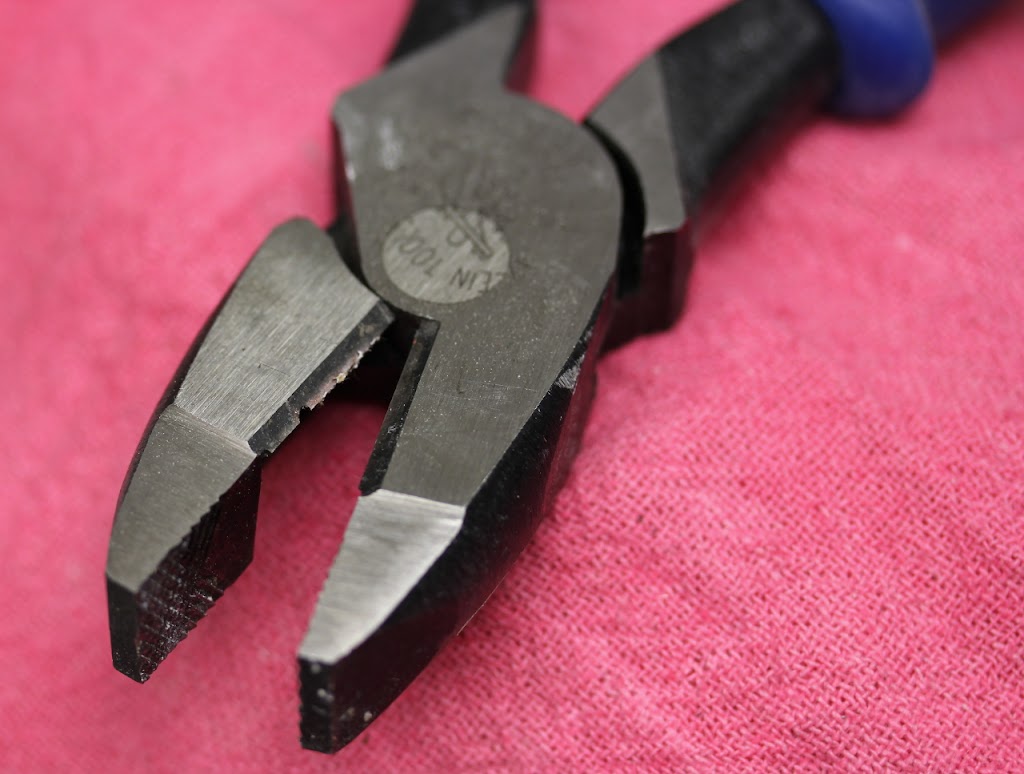 |
| my injured lineman’s tool |
So I was working in the garage installing new lights. I had verified the circuit breaker responsible for powering the circuit I would be wiring the new lights into, no problems here. Before I got around to installing the lights I realized I had other work to take care of first. So I turned the breaker back on as it was also powering outlets I needed, no problems here either.
After I was done with the sidetracking work I turned the breaker back off in preparation for wiring the lights up, no problems here either. Using my lineman’s tool I then cut the Romex line I would be reworking to run my new lights… problems.
Immediately I had lights, not of the useful overhead lighting kind, along with the popping and hissing noises which accompany shorting a live wire. I was also working on a ladder, which in this case functioned as an unnecessary excitement multiplier, which I ungracefully abandoned. The wire was roasted and my tool now had a notch of metal blasted out by the short circuit arc.
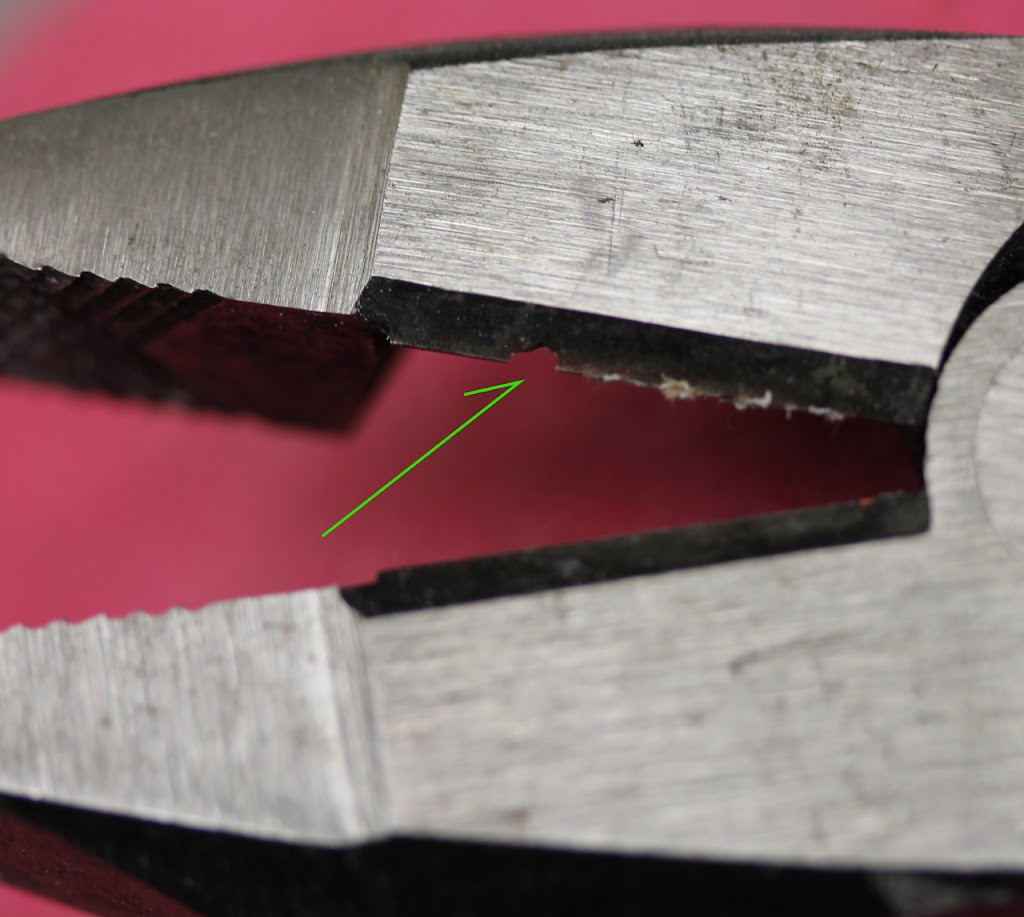 |
| closeup showing missing metal |
But the circuit breaker was off. Why was there still power?
Simple. I had turned off the wrong circuit breaker. The breaker I shut off did not have any visual manifestations which would indicate I had gotten the wrong one. So I proceeded with my work. The error was not verifying the power was off at the place and time of the work. Had I checked the line right before starting work again (I had several tools which would do this for me) I would have caught the problem.
Instead I am down one pair of pliers. A small price considering other possible outcomes.